- You are here:
- Home »
- Airbrush Lessons »
- Airbrush Masking Techniques

Airbrush Masking Techniques
Once you have gained a certain amount of proficiency in controlling an airbrush, the need to confine the spray to a given area becomes increasingly important. For this purpose, various types of masking devices are employed. Kevin Mayes put this article together to introduce you to masking techniques.
You will find that as you develop as an airbrush artist, just about any- thing you can get your hands on can be used as a mask.
Masking tape, pin stripping tapes and even contact paper have their place in a studio. But don’t be confused by terminology!
Masks and Stencils are not the same thing!
Masks, generally speaking, are cut or torn from paper, acetate or other suitable material where one edge is needed to achieve the desired effect.
Stencils are cut or torn from paper or other suitable material from the center of sheet leaving the design or shape bounded on all sides.
There are times when you will need a mask to be firmly held against the paper. For this, a light coat of spray adhesive works very well and won’t interfere with underlying work.
Any straightedge such as a triangle will be very useful. For example, held in contact with the paper while airbrushing over its edge, we get a graded tone with a sharp edge on one side. Any degree of softness can be obtained at this edge by simply holding your straightedge at some distance from the paper. The further it is held away from the paper, the softer the edge.

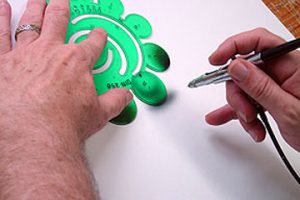
Other very interesting effects, patterns and designs can be developed by the use of french curves, circles and ovals –singly or in combination. Complete decorative landscapes, figures and trees are easily airbrushed in this manner. Other shapes for special effects can be cut or torn from paper to use as masks.


In the pictures above, I used a positive and a negative circle template to create the sphere and its shadow.
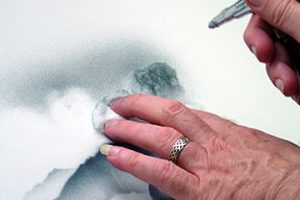
The next sequence shows the use of torn paper to create a mountain-scape. These masks are hand-held and are held in place by adjusting the spread of the fingers to keep the mask from lifting during the spraying. You can, for larger masks, use weights (pennies, washers, etc) to aid in this.

These are times when you can be creative and use objects from nature, like twigs, feathers and leaves, or things you find around the house like lace, combs or even paper clips. As you see here, I am using a cotton ball that has been stretched into a cloud shape. The effect you get with this can be very effective.

Controlling tone values becomes important. Build up dark tones slowly, avoid getting the paper too wet and the consequent running of color. With practice, one should be able to airbrush any shade of gray, using transparent black and repeating the same value many times, which is a necessity in certain designs.
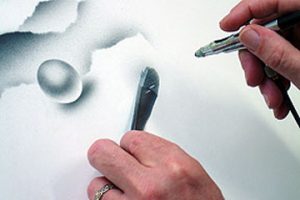
By controlling tone values, or various combinations of colors, three-dimensional effects can be created. To illustrate this, I have used a feather. By shifting its position and changing the value of the tone sprayed, a layered, three-dimensional effect has been created.

In the photographs that follow, paper-lace was positioned and sprayed to give a more interesting background to the work. After spraying and removing the lace, a light spray of color was then applied to blend the image with the background.

Now, why not clear of that table or drawing board, gather some of the items to be found, dust off that airbrush and begin experimenting and having fun painting with air.
