- You are here:
- Home »
- Airbrush Lessons »
- How To Use Frisket Film in Airbrushing

How To Use Frisket Film in Airbrushing
In this article I’ll go over the use of Frisket film in your airbrush projects, painting. We’ll be doing a very simple flame design to practice the masking technique used with Frisket film.
What is Frisket Film
Frisket film is a masking material commonly used in airbrushing. Frisket film is a clear acetate film with a low tack adhesive backing; used mostly for airbrushing illustration or mural type projects.
Be very careful using Frisket film with solvent based paints as the solvent will release the adhesive from the Frisket leaving a mess on your painting surface when you pull the Frisket film off.

Frisket film can be purchased either in flat sheets or rolls, matte or gloss finish, the matte finish is used most commonly. If you are going to be using a lot of this masking material you might find it more economical to purchase the rolls than the flat sheets.

Best Frisket Film and Masking Material
Here are some of the frisket films I have used for airbrushing…
How to use Frisket film
To show you how to use this masking material I’ll do some very simple, quick flames on Carson Airbrush paper. I purchased this airbrush coated paper from Pearl Art store I believe it was about nine dollars at the time.

Here I have very lightly draw out some flames using a number two pencil. You always want to keep your painting surface as clean as possible so keep your design lines very light, faint.
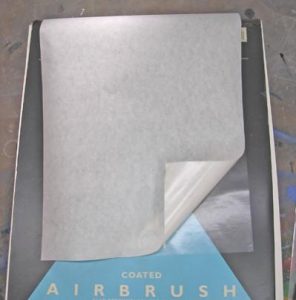
Now I’ll show you how to mask this simple flame design with Frisket film. Pull the backing from the Frisket film about an inch or two and attach it at the top of your painting surface. The backing paper should be doubled back so you can pull the backing off while applying the Frisket film. You might want to keep the backing as you might want to stick pieces of the Frisket film back on it after you cut them out of the design.


Now with the backing off, it’s time to work any air bubbles out and smooth the Frisket foil so there are no creases, wrinkles in the masking film.
Starting from the center of the Frisket use a small straight edge to smooth the Frisket out; work from the center towards the out side edges of your painting surface. You can lift parts of the Frisket and re-position it if you have to.
You can see when the Frisket film is applied and smoothed out, you can see the simple flame design I’ve drawn thru the Frisket. At this point you can use a pencil and drawn on the Frisket to further define or add to the design if you want to.

With our design out line to our liking, using a hobby knife and number eleven blade, we will carefully cut the design out of the Frisket. Do not apply pressure to the blade just drag the blade along the design out line and let the blade do the work, cutting. A
Cut the entire design out now; if you only cut part out and start painting it might well cover your design lines up making it very hard to cut later.

Save the backing from your Frisket film to attach pieces of Frisket film you cut out in case you might need them later to mask an area again.

With your design now cut out you can go back and ease any of the pencil lines that show. It’s good practice when you are cutting a design out to do so with this in mind; cut the design out so the pencil lines are inside the cut area making them easy to ease.

To paint my flames I use Pro Colors airbrush ready paint; colors red and yellow.

To start airbrushing I use the red spraying half on the Frisket film and half on the paper within the flames. Let the over spray drift out toward the center of the flames; this will provide us a good transition between the yellow and red colors in the next step.

Now add your yellow and it’s a done deal; pull the Frisket film off and there you have a nice set of simple flames.
